Empty Capacities:
Evacuation Vacuum: 30" Hg
R134A: 28 ounces
Oil: 7 ounces PAG 46
Static High Side Pressure: 95 PSI @ 85°F
Static Low Side Pressure: 120 PSI @ 85°F
Operating High Side Pressure: 260 PSI @ 85°F
Operating Low Side Pressure: 38 PSI @ 85°F
Low Pressure Switch: 28.5 PSI (2 kg/sq cm)
Safety Switch Pressure: 320 PSI (22.5 kg/sq cm)
Safe Operating Pressure Ranges
Ambient °F Low Side High Side
65°F-------------25-35 PSI------135-155 PSI
70°F-------------35-40 PSI------145-160 PSI
75°F-------------35-45 PSI------150-170 PSI
80°F-------------40-50 PSI------175-210 PSI
85°F-------------45-55 PSI------225-250 PSI
90°F-------------45-55 PSI------250-270 PSI
95°F-------------50-55 PSI------275-300 PSI
100°F-----------50-55 PSI------315-325 PSI
105°F-----------50-55 PSI------330-335 PSI
110°F-----------50-55 PSI------340-345 PSI
THE COMPLETELY FRANKESNSTEIN-ED CLIMATE CONTROL SYSTEM
The car came with what I think was a dealer installed R-12 AC system. No parts schematics or parts lists matched up to any of the parts that were in the car. For days, I searched the internet and even wasted the parts guy's time at a Ford dealership to print out and look up every bit of info that he could find. Nothing even resembled the parts that I had. I took out all the parts and decided to make everything up myself.
This AC system frustrated me so much, I don't even want to make this page. Working off and on this took at least a year to finish. Since eventually, I will have to service this system, I feel like I need to at least keep track of some of the details just so I don't have to reverse engineer it again.
At first, I tried to just buy ALL the parts from a more recent 302 that was designed for R-134A and install them. Easy, right? No. I can't remember the exact reasons why, but it was horrible. To keep me from throwing wrenches around, I had to push all that wasted time and effort out of my brain and start from scratch. I was so pissed about this AC system that I actually got help for this part, and let somebody else make some decisions. It ended up centering around a Vintage Air heater box and the rest of the system parts were added that worked no matter what vehicle they were from. Now, cold air blows out of the vents.
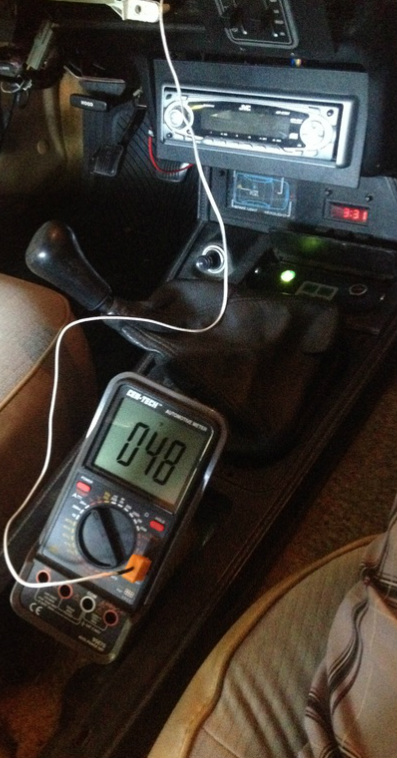
At the center vent, 48°F was as low as I could get it parked at idle. The weak link in the system is the $20 junkyard compressor from a 1982 Escort.
AC COMPRESSORS, CLUTCHES, AND SHIMS

The AC compressor shaft has a clutch assembly mounted on it which consists of a coil, pulley with a bearing and a clutch plate. mounted on it. The part that is most likely to cause problems is the clutch plate. If an AC system is acting up the most expensive fix is to replace the entire compressor and clutch assembly. Many people recommend this because it is easy. Easy usually isn't cheap. A less expensive fix is to replace the AC clutch assembly. The clutch plate can also be purchased separately. The least expensive fix is to shim the compressor clutch to the proper air gap.
When the AC system is off, the clutch is disengaged from the pulley while the pulley rotates with the belt. When the AC system is cooling, the coil pulls the clutch against the pulley and the clutch also rotates with the belt. When the clutch is rotating, the compressor shaft is rotating and compressing refrigerant. The compression and heat transfer causes a phase change of the refrigerant and this is what removes heat and humidity at the evaporator in the vehicle cabin.
There needs to be space between the pulley and the clutch, otherwise the compressor will always be running. If there is too much space, then the clutch may never get close enough to engage the compressor. This air gap should be between about 0.015" and 0.030" I have read about the "money test," where you use a dime and a nickel to measure the air gap. This is a good test if your gap is way out of line, but if you can slide even a dime between the clutch and pulley, the gap is still too big.
Shims increase the air gap and are basically washers. Shim kits are expensive, but washers are cheap. A regular micrometer can't fit in the gap to measure, but the micrometer can measure whatever thin things that can be scrounged up. I found a coping saw blade that was 0.021" thick, so that is my air gap measurement tool. I also dug up some washers that were about the same thickness as the factory shims, and those have now tripled in value because they are "AC compressor shims." You can use whatever you want as shimming material. Google it and you will find people use thin metal, bread tabs, zip-ties etc to get the correct gap.
As the clutch plate wears, shims need to be removed and the air gap readjusted. Eventually, there will not be any more shims to remove and the clutch plate needs to be replaced. When there is a chatter from the engine when the AC is on, it is probably coming from the clutch or a worn compressor shaft.
COMPRESSOR PARTS
Factory Installed Air
Nippondenso Compressor: 6P148A - E2EH-19D623-AA
Clutch Assembly: E8LY2987A
Coil: E8DH-19D798-AA
MotorCraft Coil: YB357
Pulley / Bearing: E2ZH-19D784-AA
Clutch Plate: E43H-19D786-AA
Compressor Electrical Connector: TEM 207720
Aftermarket Clutch Assembly- Factory Air by Four Seasons Factory Air Parts Search
Clutch Assembly: 47854
Coil: 47854 / 273225 / 877854 / 133091
Pulley Bearing: NSK 576 40BD219DUK
Clutch: Ogura FD-MG04 101
RANDOM INSTALL ITEMS
HEAT, AIR CONDITIONING AND DEFROST
This is the smallest heater box that Vintage Air makes. Trying to cram anything behind the dash is a nightmare, so small is good. VA uses servo motors, so there are no more vacuum lines and supposed to last a long time.
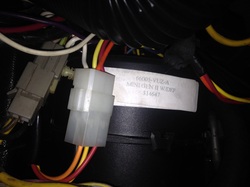
Vintage Air Universal Heat/AC System - 66005-VUZ-A
Install Instructions
4 Lever Gen II Control - 49110+SVQ
Heater Control Valve -
Expansion Valve - 10QFKAZ - 2M18F
Receiver/ Drier: RD-1003
Vintage Air Universal Heat/AC System - 66005-VUZ-A
Install Instructions
4 Lever Gen II Control - 49110+SVQ
Heater Control Valve -
Expansion Valve - 10QFKAZ - 2M18F
Receiver/ Drier: RD-1003
PANEL CONTROLS
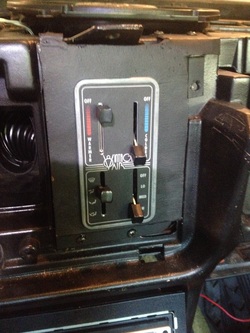
While this doesn't look factory, I was satisfied with the way it looks. The trim panel is missing, so it might look a little strange. The black surround mounting panel was made by a tech at a local hydraulic shop. He did a good job and it was much easier to hear him complain about working on this thing than me have to even look at this AC system.
